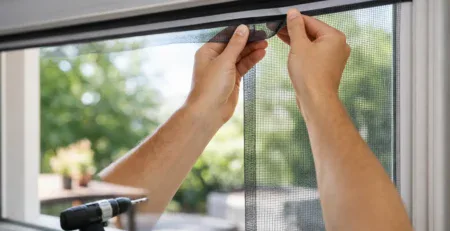
Fresh air without the fly, wasp, or midge that comes with it — that’s the entire case for a retractable fly screen. Unlike a fixed panel that sits in your window or doorway all year, a retractable screen rolls or slides away when you don’t need it and pulls back across in seconds when you do.
We’ve been making these to measure for UK homes and businesses for over 30 years, which means we’ve fitted them to just about every awkward opening the British housing stock can produce — timber sash windows that are slightly out of square, bi-fold doors with uneven cills, listed buildings where nothing can be drilled into the frame. That experience shapes everything below, Shopping for one now? See our roller fly screens for windows
How a Retractable Fly Screen Actually Works
Strip away the marketing language and a retractable screen has three parts:
- A cassette — a slim aluminium housing the mesh rolls or folds into when it’s not in use. This is what keeps the screen out of sight the rest of the time.
- The mesh itself — the actual barrier against insects, held taut across the opening when deployed.
- Guide rails — channels either side of the opening that keep the mesh moving in a straight line and give it a proper seal at the edges, rather than just flapping loose.
Pull the mesh across when you want the ventilation without the insects, retract it when you don’t. That’s the whole mechanism — no motors or remotes required for the vast majority of domestic installations, though motorised versions exist for harder-to-reach openings.
Vertical or Horizontal — Which Suits Your Opening
This is the decision that matters most, and it comes down to how the opening itself moves, not personal preference.
Vertical roller screens pull down from a cassette mounted at the top of the frame, the same way a roller blind operates. These suit:
- Sash windows, where the vertical pull mirrors how the window itself slides
- Casement windows and kitchen or utility windows
- Any opening where a side-mounted cassette would be in the way
Horizontal sliding screens move across from a cassette mounted at the side, keeping the floor or sill completely clear — no trip hazard along the bottom. These suit:
- Bi-fold, patio and French doors
- Wider openings where a top-mounted cassette isn’t practical
- Commercial entrances with high foot traffic
If you’re screening a door people walk through regularly, horizontal is almost always the right call — a bottom track underfoot is the single most common complaint we hear about screens fitted the wrong way round. If you’re screening a window, vertical nearly always wins because it uses the same motion the window already makes.
Wide Openings: Plissé and Motorised Systems
Two variations are worth knowing about before you order.
Plissé screens fold like a concertina rather than rolling onto a drum, which lets them span much wider openings than a standard roller. For bi-folds and large patio runs they’re often the only sensible retractable option — the deciding factors are how wide the opening is, where the screen stacks when it’s open, and how low the bottom track can be kept for daily use.
Motorised screens replace the manual pull with a switch or remote. For the vast majority of domestic windows and doors they’re unnecessary, but they earn their place on openings that are genuinely hard to reach — high-level glazing, atriums, or architectural runs where a manual pull would mean fetching a ladder.
Choosing the Right Mesh
Mesh choice is a trade-off between how much you’re filtering out and how much air and light you’re letting through. We offer four:
- Standard insect mesh — the all-rounder. Stops flies, wasps and bees while keeping visibility and airflow close to an open window. Right for most homes.
- Superfine midge mesh — a tighter weave for properties near water or in the Scottish Highlands, where standard mesh apertures are too wide to stop midges.
- Pollen mesh — a finer weave aimed at reducing airborne allergens, for hay fever sufferers who want to open windows during peak pollen months without the usual consequences.
- Toughened pet-resistant mesh — a vinyl-coated polyester mesh built to resist scratching and pushing from cats and dogs, for openings pets have regular access to.
If you’re not sure which applies, the honest answer is: default to standard mesh unless you have a specific reason not to (a waterside location, a hay fever suffer in the house, or a pet that uses that door or window). Upgrading mesh adds cost for a problem you may not actually have.
Measuring — Where Most Ordering Mistakes Happen
Because every screen we make is cut to order, an inaccurate measurement is the most common thing that goes wrong with any online order — not just ours. Two approaches apply:
Reveal fit — the screen mounts inside the window or door recess. Measure width at the top, middle, and bottom (older properties in particular are rarely perfectly square), height at both sides and the centre, and check for anything that intrudes into that space — handles, trickle vents, tile edges, old sealant.
Face fit — the screen mounts onto the surrounding frame or wall rather than inside the recess, used when the reveal is too shallow, uneven, or already crowded with fittings. Here you’re measuring the available flat fixing area, not the glazed opening itself, and confirming that surface is sound enough to fix into.
The mistake we see most often: someone measures the visible glass rather than the full installation zone, or doesn’t account for which way the window or door opens before ordering. Measure the space the mechanism needs to occupy, not just the gap you’re trying to cover — and if in doubt, our measuring guide and instant quote tool will flag anything that looks off before you order.
DIY Kit or Professional Fitting
DIY suits you if: the opening is a straightforward domestic window or door, the fixing surface is flat and accessible, and you’re comfortable mounting hardware with a drill and a spirit level. Kits are supplied ready to fit, with the measuring guide above doing most of the heavy lifting.
Professional fitting is worth paying for when: it’s a commercial installation — particularly food premises, where the screen is part of your pest-control and hygiene setup and needs to meet the standard an environmental health inspection expects — or when you’ve got several openings that need to align consistently, or an opening that’s awkward, high up, or heavily used. In a business setting, a badly fitted screen is a problem you pay to fix twice; get it right once.
Commercial Premises and Food Safety
Businesses rarely buy screens for comfort alone. In food environments the screen is part of how the premises stays clean, compliant and ready for inspection.
UK food hygiene law requires that windows and other openings to the outside are fitted with insect-proof screens where necessary, and — the part that catches people out — that those screens can be removed easily for cleaning. A screen that’s awkward to take down is a screen that doesn’t get cleaned, and an Environmental Health Officer will spot the difference.
In practice that means the screen has to cover the opening properly, come away cleanly for cleaning, and still let staff use the window or door the way they need to. Retractable systems tend to suit these settings better than fixed panels or chain screens: they protect the opening when it’s in use and retract out of the way when access or cleaning is needed, without the industrial look of a chain curtain in a customer-facing space. Restaurants and cafés, commercial kitchens, food production and packing areas, and school or care-home catering settings are where we fit them most often.
If it’s a commercial installation, get it fitted properly. A poorly fitted screen in a food setting isn’t just an inconvenience — it undermines the hygiene control it was bought to provide.
What Actually Drives the Price
We don’t publish a single flat price because there isn’t one — cost is driven by the size of the opening, the mesh you choose, the frame finish, and whether you want it supplied only or professionally fitted, same as our other made-to-measure ranges (our double roller door screens, for example, start from £390 + VAT before mesh and fitting options are factored in). The honest way to get a real number for your opening is our instant online quote tool: pick the screen type, enter your dimensions in millimetres, choose your mesh and frame colour, and the price is calculated there and then — no sales call required to find out what something costs.
Keeping It Working
A retractable screen has moving parts, so it needs a little more attention than a fixed one — though not much:
- Wipe the mesh with a soft, damp cloth and mild soap when it picks up dust or kitchen residue.
- Vacuum the guide rails periodically — grit in the channel is the most common cause of a screen that starts sticking.
- A light silicone-based spray on the tracks once a year keeps the mechanism moving smoothly.
If a screen that used to glide starts catching at one end or closing unevenly, that’s the guide rails asking for a clean before it becomes a repair call.
Common Questions
Can retractable screens be fitted to bi-fold doors?
Usually yes, most often with a plissé or other wide-opening system. The question isn’t really whether it’s a bi-fold — it’s how wide the opening is, where the screen will stack, and how low the track needs to sit for everyday use.
Are they suitable for exposed or windy sites?
Some are, some aren’t, and it depends on the elevation rather than the product. A screen on a sheltered garden-facing window is a different proposition from one on a coastal gable. Tell us where the property is and how exposed the opening is, and we’ll steer you to something that will cope.
How long should one last?
A well-made aluminium-framed screen, correctly specified and kept clean, should give many years of service. The things that shorten that are poor fitting, rough handling, and grit left to build up in the tracks — all avoidable.
Is it worth it compared with a cheap online kit?
For a spare bedroom you barely open, a cheap kit may be fine. For a main window, a patio door, or anything in a food premises, bespoke sizing and a proper frame will save you the frustration of a screen that catches, sags, or gets taken down in August and never goes back up.
The Custom-Made Difference
Every screen above is made to the exact dimensions of your opening, not trimmed down from a standard size — which matters more in the UK than it might elsewhere, given how often older housing stock turns out to be slightly out of square. Because we manufacture in-house rather than importing and reselling, trade pricing is available to everyone who orders, not just account holders. That’s the same reason a family-run manufacturer with three decades behind it can quote a fitted price as confidently as a DIY one: we’ve made both routes work for exactly this kind of opening before.